
Following the last post on my Year 9 co-construction activities, we have been enjoying learning about Space and Pressure. The Space Team has had a lot of interesting ideas and, between us, we have planned and delivered some interesting lessons.
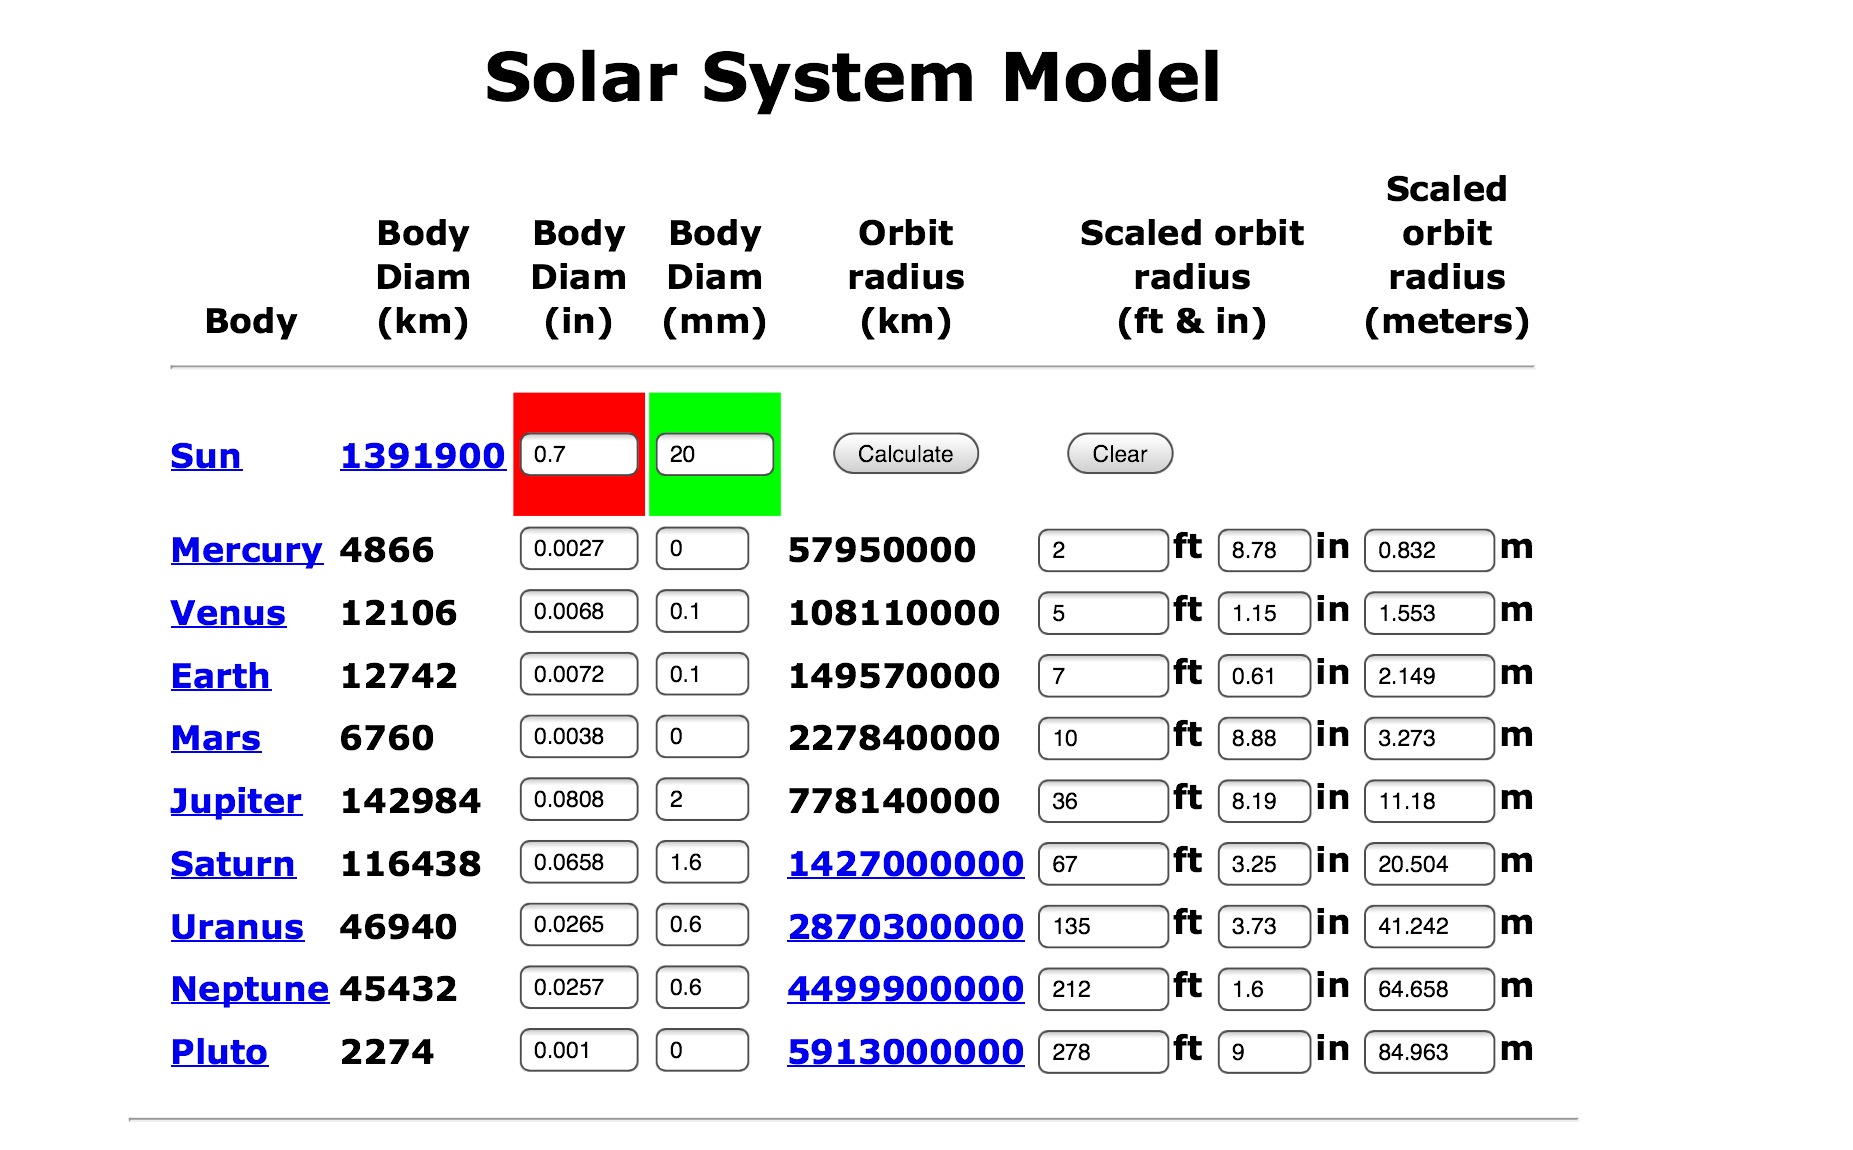
The lessons on scale of distance and size in the universe and solar system were fascinating. One of the students found this interesting conversion table on the internet and we used that as a checking mechanism after students had been asked to create a scale model in their books.
We enjoyed creating a scale model of the Solar System on the school field.

We then looked at a range of everyday phenomena, asking students to account for them in terms of the Earth’s rotation. This included seasonal variations in day length, temperature and Sun trajectory in the sky, the Sun rising in the East, different day lengths on planets. I led this lesson.
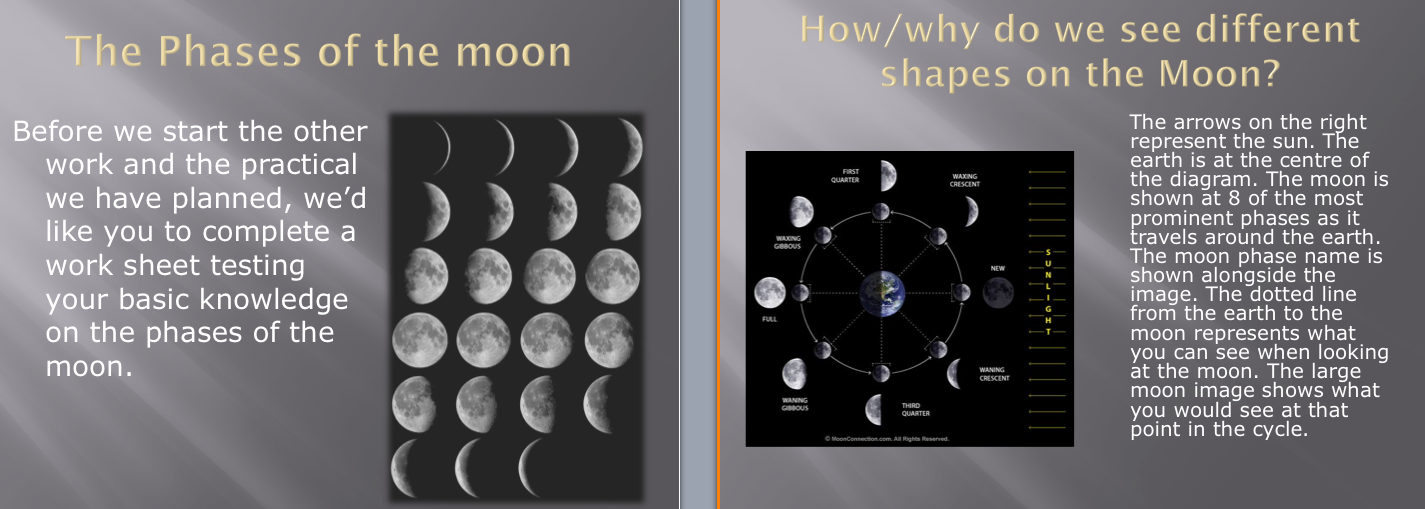
The following lesson, students led us through the phases of the moon. We started with this lovely video that one of the team discovered online:
They also prepared a PowerPoint with some images to accompany a blank worksheet requiring students to fill in the correct moon shapes much like the diagram on the right; this was used to give the answers at the end.
The highlight of the lesson was creating a model in the lab with a slide projector and globe. It worked extremely well. Here is one of the team with a crescent moon.

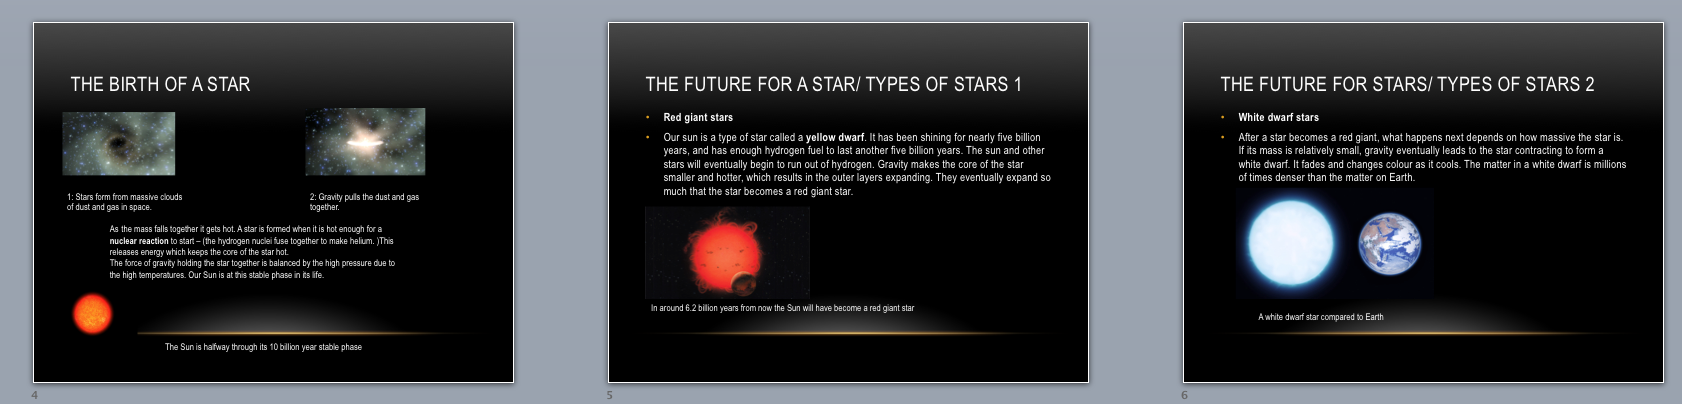
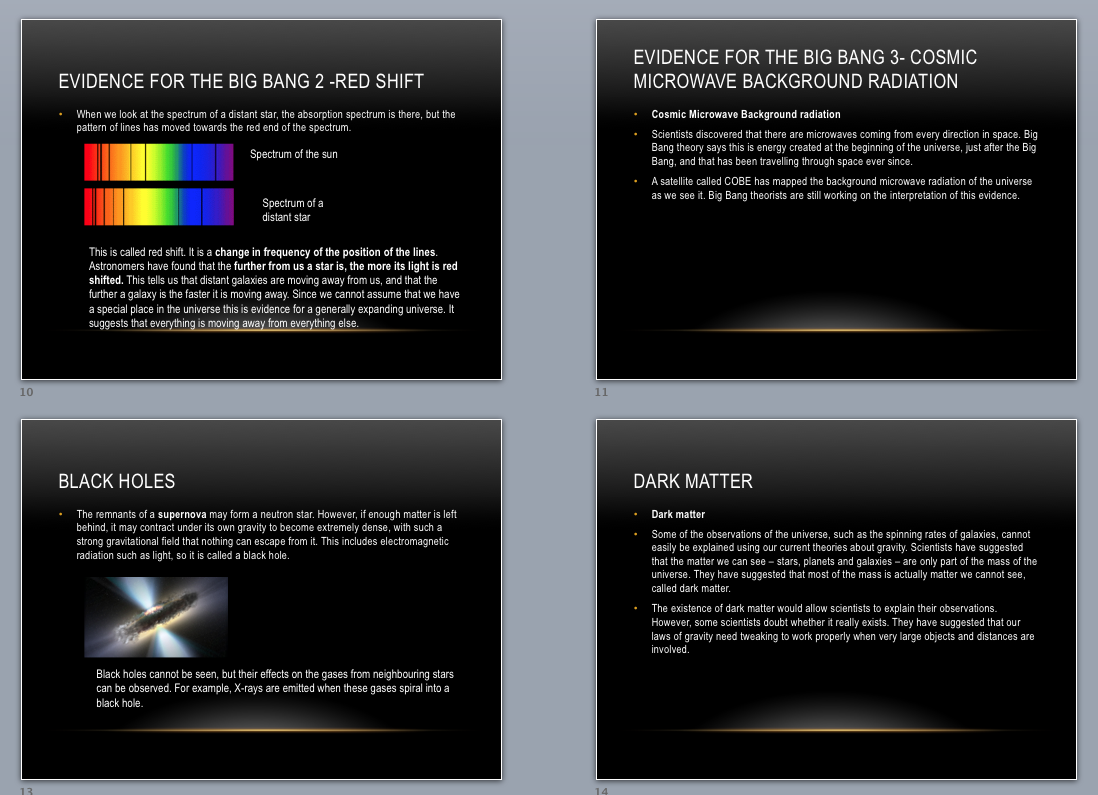
In the following lesson we moved on to look at more features of space. Strictly speaking this is not on the Year 9 scheme of work. It isn’t in the departmental tests for Year 9, but the Space Team were determined to look at the structure of stars, black holes and dark matter. So we did. They found or made most of the resources: This was a detailed Powerpoint exploring lots ideas:
I especially liked the work on black holes and dark matter. The slides continued:
The lesson the students planned was really a lecture of sorts; and it worked with slides, videos and discussions interspersed. We decided to put all the input in one lesson and then, the next lesson, we did some work on questions, recall and checking for understanding. Here was a video the students showed on black holes. I like the fact that they found it on the tesconnect website, just as a teacher would do.
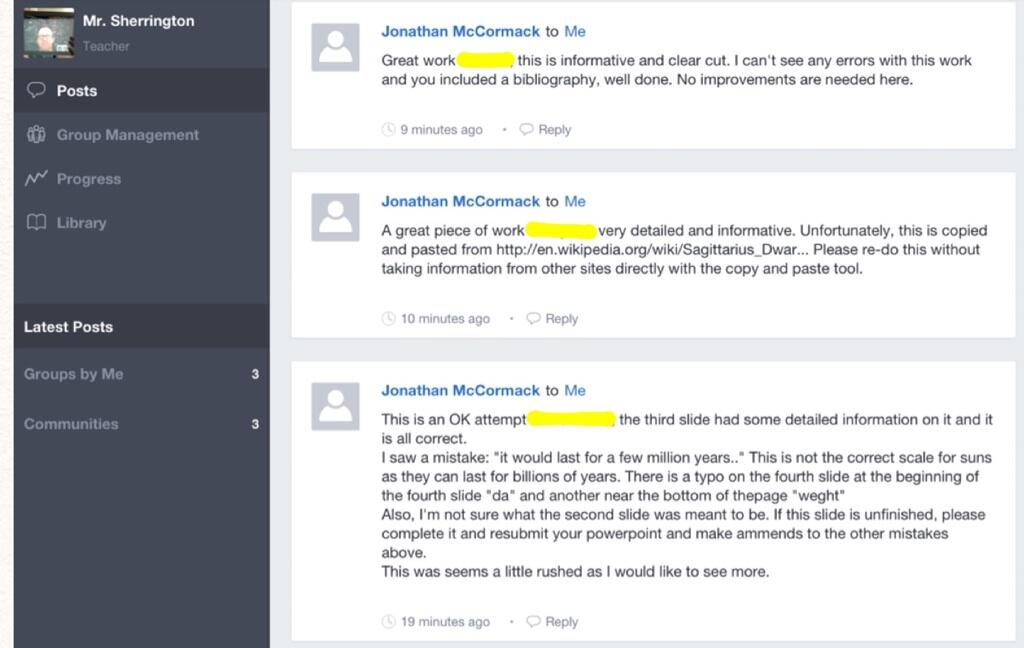
As part of the topic, students were asked to complete a research homework about an interesting object in space, explaining the key features of it using as much physics as possible. They uploaded their work to Edmodo for all to see. The Space Team then divided up the returns to give feedback. Some of their comments are superb – and quite demanding. Here is Trevor:

In this example, Jonathan catches one of his peers doing a bit too much copy and paste! He also identifies errors for correction.
The major flaw in this process – discovered too late – was that when the students receive the feedback, everyone else in the class can see it too! That wasn’t supposed to happen; I’ll need to find a different way of doing it. (Any Edmodo users… suggestions for peer-to-peer feedback most welcome.)
Moving on from Space, the same group of students has been responsible for the topic of Pressure.
This has given us the opportunity to do some class experiments and demonstrations. The first lesson was an introduction to the pressure equation. Two students did this, setting out the P= F/A triangle and then setting the class off to measure various pressures – such as the pressure created by a person sitting on a stool, measuring the area of the legs and the weight of the person.
By coincidence, the excellent people Jonathan Sanderson, Alom Shaha who run the new website ScienceDemo.org has posted a film of a collapsing can demo with vacuum flask alternative.
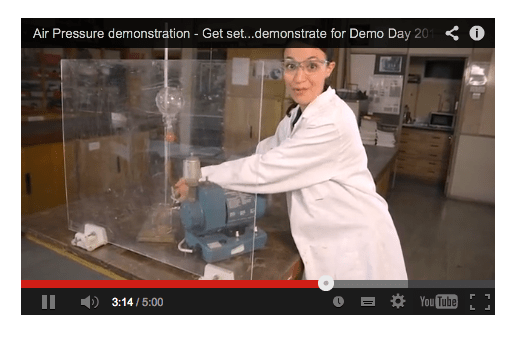
I met my student team at lunchtime to practice the demos, with the help of our technicians. They did a few trials of the collapsing can before doing it with the class.
To begin with, Trevor, shown here in full flow, explained the concept of fluid pressure using the classic ‘peeing can’, doing a good job asking questions as he went along.
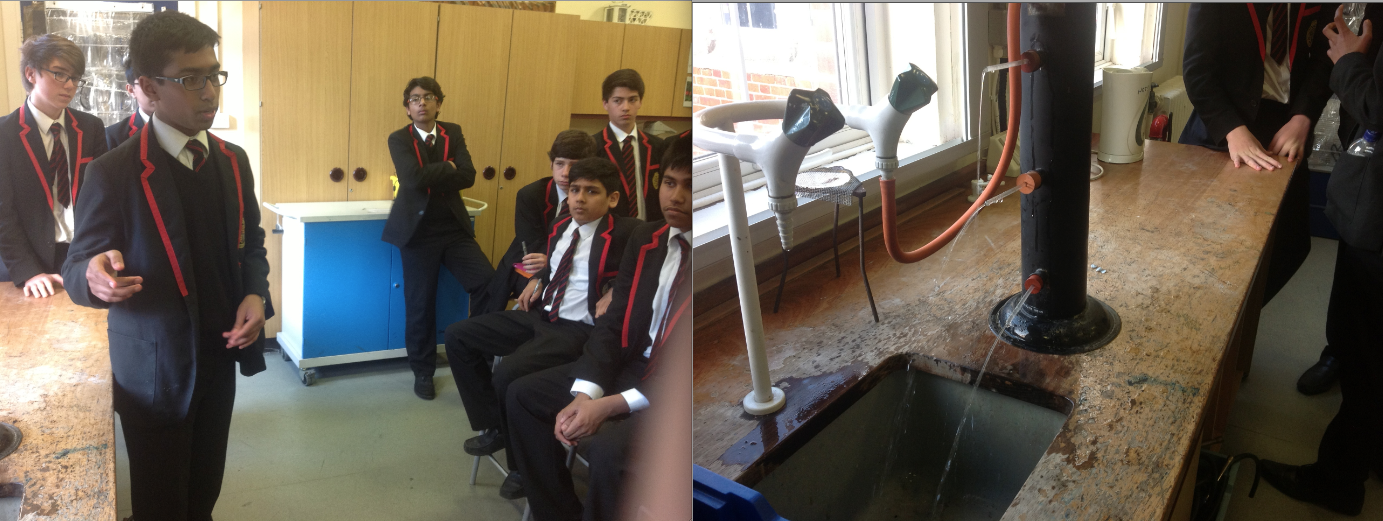
The demos went really well, just as they were presented in the video. I posted a picture on twitter and, to my great joy, Jonathan added it to the website; it went back to where we got the idea from. Wonderfully circular!

Next, we are looking at hydraulics and then it will be time for some consolidation with written questions and tests.
This group has taken a while to get organised but they are getting into their stride. They talk directly to technicians, take responsibility for communicating the homework and are getting better at running question and answer sessions. Most importantly, they feel confident in suggesting ideas for activities and content and we are able to team-teach between us more effectively as they get better at it.
More to come. Well done 9M. We’re doing really well.

Reblogged this on paddington teaching and learning.
LikeLike
[…] http://headguruteacher.com/2014/01/24/y9-science-co-construction-continues-with-space-and-pressure/ […]
LikeLike
[…] and conclusions of others. That in itself is part of the real-world scientific process. The co-construction method that I’m exploring is based around groups working together and I believe that adds significant value to the learning […]
LikeLike
[…] to log test scores. We have also experimented with peer feedback as described in this post: Science co-construction continues with Space and Pressure. That had more mixed results. More generally, Edmodo provides us with a means of communicating […]
LikeLike
[…] it back’ is a cornerstone of the co-construction process I use with my Year 9s. I spend a bit of time with the leading team making sure they understand the concepts before […]
LikeLike
Very brave, especially with the amount of content we have to get through in the GCSE Science course. I have got a Year 10 single chemistry class and a double year 11 class this year and I may look at getting to plan some homeworks for the upcoming topics. Keep up the great work it seems like your pupils are clearly enjoying it.
LikeLike